Master Continuous Zipper use for custom projects. Learn to cut, attach sliders, and finish zippers with expert tips.
A Continuous Zipper is a roll of zipper tape without pre-installed stops that allows you to cut any length needed for your project. Also called “zipper by the yard,” this flexible solution eliminates waste and provides unlimited customization for industrial applications.
Quick Facts About Continuous Zippers:
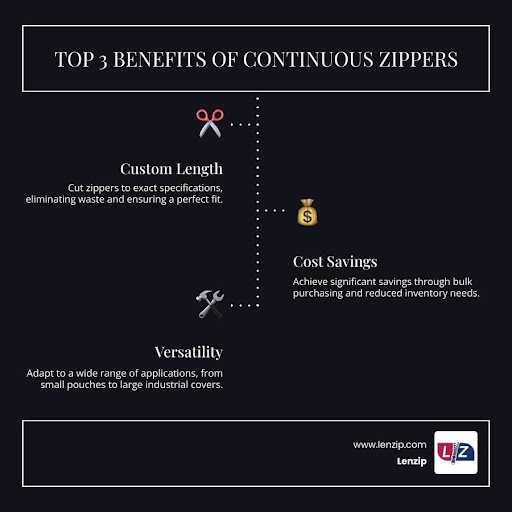
- Custom Length: Cut exactly what you need, from 6 inches to 120+ inches
- Cost Effective: Substantially cheaper than pre-cut alternatives
- Material Options: Available in nylon coil, molded plastic, metal, and specialty materials
- Requires Assembly: You add sliders and stops to create a functional zipper
- Closed-End Only: Cannot create separating zippers like jacket fronts
Manufacturing professionals across automotive, marine, and furniture industries are finding that continuous zippers solve their biggest headaches. No more ordering multiple zipper lengths “just in case.” No more project delays waiting for custom sizes.
“Continuous zipper rolls allow for custom zipper lengths, minimizing waste,” explains one industry expert. When your upholstery project needs a 47-inch zipper or your marine canvas requires an unusual 83-inch length, Continuous Zipper tape delivers exactly what you need.
The learning curve is minimal. Within days, you’ll master measuring, cutting, and attaching sliders. Within weeks, you’ll be finishing zippers like a pro. By day 30, you’ll wonder why you ever struggled with fixed-length limitations.
For a concise overview of zipper history and mechanics, see Zipper.
We’ve been in the zipper business for 80 years, and we’ve seen how the right tools and techniques can revolutionize efficiency. This guide will walk you through everything you need to know to become a Continuous Zipper master. You’ll gain the confidence to tackle any project, no matter how unique its zipper requirements. Let’s explore the essential skills that will transform your approach to custom zippers. If you want to learn more about zipper components and types, check out our Zipper Terminology guide.
The Essential Guide to Working with a Continuous Zipper
This section covers the fundamental skills for turning a roll of zipper tape into a functional component for any project. Think of it as your toolkit for zipper success – once you master these three steps, you’ll be creating custom zippers like a pro.
Step 1: Measuring and Cutting Your Zipper
The magic of Continuous Zipper tape starts with getting the perfect length for your project. No more settling for “close enough” – you can cut exactly what you need, whether that’s 13 inches for a cushion cover or 87 inches for a boat canvas.
Start by measuring your project carefully. We can’t stress this enough: measure twice, cut once! It’s much easier to trim a little extra than to start over with a new piece of tape.
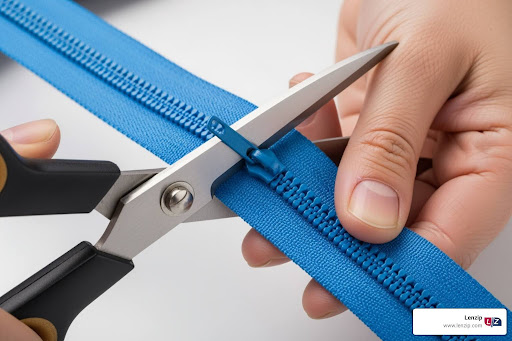
The cutting technique depends on what type of Continuous Zipper you’re working with. Nylon coil and molded plastic zippers are the friendliest – just grab sharp scissors or a rotary cutter and make a clean, straight cut. These materials slice through easily and won’t fight back.
Metal zippers need a bit more respect. While you can cut the tape itself with regular scissors, those metal teeth require special attention. You’ll need to carefully remove about 1.5 cm of teeth from one side near your cut using zipper pliers. This prevents the teeth from interfering when you attach the slider later.
Here’s a pro tip from our 80 years in the business: always use the sharpest tools you have. Dull scissors create frayed edges that can cause headaches down the line. For metal zippers, smooth any rough edges after removing teeth – your fingers (and your fabric) will thank you later.
Step 2: How to Attach a Zipper Slider to Your Continuous Zipper Tape
This is where the real magic happens – changing your cut tape into a working zipper. Don’t worry if it feels tricky at first. Even our most experienced customers needed a few tries to get the hang of it.
Before you start, double-check that your slider matches your Continuous Zipper tape size. A #5 slider only works with #5 tape, and forcing the wrong size will just lead to frustration.
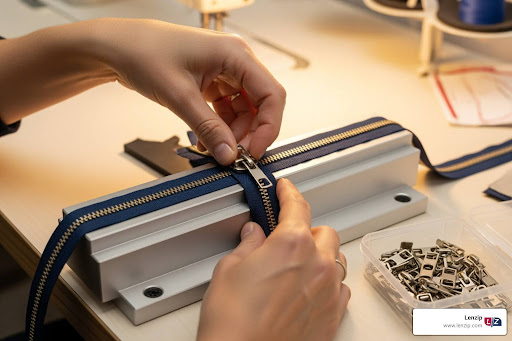
The standard method starts with preparing your tape. Cut the end as straight as possible, then gently pull apart the bottom 2-4 inches to create a V-shape. For easier insertion, trim about half an inch of teeth from one side – this creates a helpful stagger.
Now comes the moment of truth. Thread the trimmed side into one opening of the slider first, making sure the rounded part faces up toward the visible teeth. Then carefully guide the other side into the second opening. Both sides should sit evenly inside the slider.
Hold the slider firmly and pull both tape ends down simultaneously. The slider should glide smoothly up the tape. If it feels stuck or wobbly, don’t force it – just unthread and try again.
Here’s where we’ll let you in on a secret: many professionals swear by using a zipper jig. This simple tool holds your tape perfectly aligned, making slider attachment almost foolproof. Some crafty folks even make their own using a bent fork screwed to a piece of wood – though a proper jig works much better.
Step 3: Finishing Your Zipper for a Professional Look
You’re almost there! The final step transforms your Continuous Zipper from a functional component into a polished, professional-looking element. Since continuous tape doesn’t come with pre-installed stops, you get to choose exactly how to finish the ends.
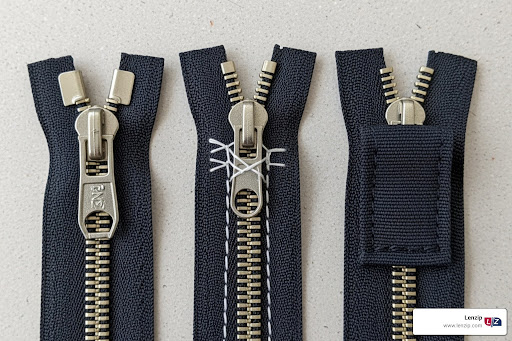
Top stops and bottom stops create the most traditional finish. These small metal pieces crimp onto your zipper tape, creating solid barriers that keep the slider exactly where it should be. You’ll need specialized pliers, but the result looks incredibly professional – especially on metal zippers.
Sewing over the ends offers the simplest approach, particularly popular in upholstery and bag making. Just create several tight rows of stitching (called a bar tack) across the zipper teeth at both ends. It’s strong, effective, and perfect when the zipper ends will be hidden in seams.
For an extra polished look, consider fabric tabs. These small pieces of fabric encase the zipper ends, extending slightly beyond your sewn stops. They add sophistication and can completely hide the zipper mechanism when desired.
Sometimes the best finish is the invisible one. When creating pouches or working with upholstery, you can let the Continuous Zipper tape extend right into your seam allowance. The seam itself becomes the stop, creating the cleanest possible appearance.
For heavy-duty applications, Webbing provides an extra-strong barrier. Sewing a piece of durable webbing across the tape creates a robust stop that can handle serious wear and tear.
The method you choose depends on your project needs and aesthetic goals. That’s the beauty of Continuous Zipper tape – complete customization from start to finish.
Choosing the Right Zipper Type & Creative Applications
Selecting the correct material and size for your Continuous Zipper is like choosing the right tool for the job – it makes all the difference between a project that lasts and one that falls apart. After eight decades in the zipper business, we’ve seen what works and what doesn’t.
Understanding Zipper Materials and Gauges
The world of Continuous Zipper materials offers something for every project, from delicate home décor to heavy-duty industrial applications. Let’s walk through your options so you can make the best choice.
Nylon coil zippers are the workhorses of the zipper world. Made from continuous coils of nylon, they bend and flex beautifully around corners and curves. This makes them perfect for luggage that gets tossed around, bags with rounded edges, and any project where the zipper needs to follow a contoured seam. They’re incredibly strong under horizontal stress – the kind of pull that happens when you stuff a bag too full.
Molded plastic zippers (sometimes called “chunky” zippers) take a different approach. Their teeth are molded directly onto the tape from corrosion-proof plastic, creating a robust closure that’s ideal for straight applications. Think outdoor cushions, tents, and heavy-duty bags. While they’re tough as nails, keep in mind that if one tooth breaks, you’ll need to replace the entire zipper.
Metal zippers bring both strength and classic style to your projects. Whether made from brass, aluminum, or nickel, they offer best durability and that satisfying “zip” sound we all know. They work best in straight seams where their rigid nature is an advantage rather than a limitation. Perfect for work pants, upholstery, and anywhere you want that rugged, industrial look.
For projects where you want the zipper to disappear, invisible zippers are your secret weapon. These nylon coil zippers hide their teeth beneath the tape, creating an almost seamless closure. They’re fantastic for pillows, formal wear, and any home décor project where you want function without the visual distraction.
When your project faces the elements, water-resistant zippers step up to the challenge. Their polyurethane coating over nylon coil creates a barrier that keeps moisture out – essential for outdoor gear, marine applications, and specialized clothing.
For the most demanding environments, fire retardant zippers made with materials like Nomex® can withstand extreme temperatures. These specialized Continuous Zippers are crucial for industrial uniforms and protective covers where safety isn’t negotiable.
Understanding zipper gauge is equally important. This number (#3, #5, #10) tells you the width of the teeth when closed. A higher number means a bigger, stronger zipper. #3 zippers work beautifully for small pouches and lightweight projects. #5 zippers are the sweet spot for most bags, jackets, and outdoor cushions. When you need serious strength for heavy-duty luggage, tents, or industrial applications, #10 zippers deliver the muscle you need.
Common Projects and Advanced Techniques
The beauty of Continuous Zipper tape really shines when you see it in action across different projects. We’ve watched customers transform everything from tiny pouches to massive industrial covers using the same fundamental techniques.
Upholstery and home décor projects love Continuous Zippers because standard furniture rarely calls for standard zipper lengths. Whether you’re making custom outdoor cushions for an oddly-shaped patio set or creating pillow covers that need to fit just right, cutting your zipper to the exact length eliminates guesswork and waste.
Bag makers and luggage creators have finded that Continuous Zippers open up design possibilities that pre-cut lengths simply can’t match. From small cosmetic pouches to enormous duffel bags, you can create compartments of any size. Nylon coil zippers are often the favorite here because they handle the stress and movement that bags endure daily.
The outdoor gear industry relies heavily on Continuous Zippers for tents, sleeping bags, and equipment covers. When you’re creating a tent that needs a 180-inch zipper or a boat cover with multiple access points, the ability to cut exactly what you need becomes invaluable. Molded plastic zippers often win in these applications for their weather resistance and durability.
Industrial and commercial applications showcase where Continuous Zippers truly excel. Large equipment covers, specialized enclosures, and custom marine canvas often require zipper lengths that would be impossible to stock as pre-cut options. This flexibility reduces inventory costs and speeds up production timelines.
One technique that really showcases the versatility of Continuous Zipper tape is creating double-pull zippers. This involves attaching two sliders to the same piece of tape, allowing the zipper to open from either end or meet in the middle. It’s incredibly useful for sleeping bags, large bags where you want access from multiple points, and specialized covers like wheelchair accessories. You simply install the sliders facing the direction you need – sometimes the same way, sometimes opposite – depending on how you want the zipper to function.
The possibilities really are endless when you master these techniques. Every project becomes an opportunity to create exactly what you envision, rather than settling for what’s available off the shelf.
Continuous Zippers vs. Pre-Cut Lengths: A Practical Comparison
When you’re planning your next project, you’ll face an important decision: should you go with Continuous Zippers by the roll or opt for pre-cut lengths? Both options use the same continuous zipper tape technology, but they serve different needs depending on your project scale and timeline.
Understanding the key differences helps you decide which zipper type is best for your needs. Let’s break down when each option makes the most sense.
Advantages of Continuous Zippers
The benefits of choosing Continuous Zippers by the roll are compelling, especially if you’re running a business or tackling multiple projects. Here’s why so many professionals make this their go-to choice:
Cost-effectiveness is usually the first thing people notice. When you buy Continuous Zipper tape by the roll, you’re getting substantially more zipper for your dollar compared to individual pre-cut pieces. The savings add up quickly, especially when you’re working on multiple projects or running a production operation.
Ultimate customization is where Continuous Zippers really shine. Need exactly 47.5 inches for that custom boat cushion? No problem. Working on a massive tent that requires a 120-inch closure? You’ve got it covered. This flexibility eliminates the frustration of trying to make standard lengths work for non-standard projects.
The any length possible advantage opens up design possibilities you might not have considered before. Whether you’re creating a tiny 6-inch pocket or an industrial cover that spans several feet, Continuous Zipper tape adapts to your vision rather than forcing you to adapt to available sizes.
Reduced material waste feels good both environmentally and financially. You cut exactly what you need, when you need it. No more leftover zipper pieces cluttering your workspace or eating into your material budget.
For non-standard projects – those unique builds that don’t fit typical patterns – Continuous Zippers are often the only practical solution. Custom upholstery, specialized industrial covers, or artistic installations all benefit from this flexibility.
When to Use Pre-Cut Continuous Zipper Lengths
While rolls of Continuous Zipper tape offer incredible versatility, pre-cut lengths of continuous zipper tape have their place in the workshop. These are still the same continuous zipper technology, just pre-measured and often partially finished for immediate use.
Convenience is the main draw here. When you need a standard length quickly and don’t want to spend time measuring, cutting, and finishing, a pre-cut length gets you sewing faster. This works especially well for small repair jobs or one-off projects.
Pre-cut lengths are ready-to-use for standard sizes that you might use regularly. If you frequently make 18-inch pillow covers or 24-inch bag closures, having pre-cut lengths on hand can streamline your workflow significantly.
When a specific length is needed quickly, pre-cut options can be lifesavers. Maybe you’re in the middle of a project and realize you need one more zipper of a common size. A pre-cut length gets you back to work without interruption.
These pre-cut lengths are ideal for projects that do not require separating zippers – which perfectly matches what continuous zipper tape does best. Since Continuous Zippers are designed for closed-end applications like bags, cushions, and pockets, pre-cut lengths work beautifully for these standard applications.
The choice between bulk rolls and pre-cut lengths really comes down to your project scale, timeline, and how much customization you need. For high-volume work or highly customized builds, the advantages of Continuous Zipper rolls are hard to beat. For quick projects or standard applications, pre-cut lengths offer convenience without compromising quality.
Frequently Asked Questions about Continuous Zippers
Working with Continuous Zippers can feel overwhelming at first, but most questions we hear have straightforward answers. After 80 years in the zipper business, we’ve heard just about everything! Let’s tackle the most common questions that pop up when people start exploring zipper by the yard.
Can I make a separating zipper from a continuous roll?
This is probably our most frequently asked question, and the answer is no. Continuous Zipper tape is designed exclusively for closed-end applications because it lacks the essential pin and box mechanism needed for a zipper to separate completely.
Think of it this way: a separating zipper (like on your jacket) needs that special bottom piece where one side has a pin and the other has a box. When you zip it up, the pin slides into the box and locks everything together. Without this mechanism, the two sides of your Continuous Zipper will never truly connect at the bottom.
While technically possible to add separating hardware to continuous tape, it’s complex and often unreliable. For projects requiring full separation, stick with purpose-built separating zippers. Continuous Zippers excel at closed-end applications like bags, cushions, and pouches where you need the zipper to open but not completely separate.
Is continuous zipper tape directional?
Here’s where things get interesting. Generally, the tape itself is not directional, allowing sliders to be attached from either end. This flexibility makes Continuous Zippers perfect for creating double-pull configurations or simply making slider attachment easier.
However, there are important exceptions to keep in mind. Tapes with printed designs are directional, and you’ll need to pay attention to pattern orientation when attaching your slider. Nobody wants upside-down flowers on their finished project!
Metal zipper teeth have a subtle up/down orientation that affects smooth operation. While you can force a slider on either way, feeding the “down” side of the chain through the slider’s throat gives you the smoothest operation. If your slider feels sticky in one direction but glides easily in the other, you’ve probably attached it upside down. A quick flip usually solves the problem.
What are the essential tools for working with continuous zippers?
Success with Continuous Zippers comes down to having the right tools in your workspace. You don’t need a massive investment, but these essentials will make your projects much more enjoyable.
Sharp scissors or a rotary cutter are absolutely critical for clean, straight cuts that prevent fraying. For heavy materials or long cuts, a rotary cutter with cutting mat saves time and effort. Zipper sliders matching your tape’s gauge and material type are obviously essential. Zipper stops (metal or plastic) create those crucial closed ends, with metal stops requiring pliers for installation.
Speaking of pliers, they’re indispensable for metal Continuous Zippers. You’ll need them for removing teeth and crimping on metal stops. Specialized zipper pliers work best, but strong needle-nose pliers will do the job.
Finally, while not technically essential, a zipper jig is what many users call “life-changing.” It holds the zipper tape perfectly aligned, making slider attachment significantly easier and faster. Even experienced professionals swear by them. Once you try one, you’ll wonder how you ever managed without it.
Conclusion: Your Next Step in Zipper Mastery
You’ve just open uped a game-changing skill that will transform how you approach custom projects. From measuring and cutting your first piece of Continuous Zipper tape to mastering slider attachment and creating professional finishes, you now have the complete toolkit for zipper success.
Think about what this means for your work. No more ordering multiple zipper lengths “just in case.” No more project delays waiting for that oddball 73-inch zipper. No more compromising your design because standard lengths don’t quite fit. You’re now in complete control of your zipper destiny.
The cost savings alone will surprise you. When you start calculating what you’ve been spending on individual pre-cut zippers versus buying Continuous Zipper tape by the roll, the numbers speak for themselves. Add in the waste reduction and the ability to tackle any custom length, and you’ve got a winning combination.
But here’s the thing about quality – not all Continuous Zippers are created equal. When your reputation depends on delivering durable, professional results, the source of your materials matters tremendously.
For projects demanding the highest quality and durability, consider sourcing from a trusted domestic manufacturer. Lenzip offers a wide range of American-made industrial and commercial Continuous Zippers to meet your exact specifications. With 80 years of experience in the zipper business, we understand what it takes to create products that perform under pressure and stand the test of time.
Whether you’re tackling marine canvas that needs to withstand harsh weather, industrial covers for heavy equipment, or custom upholstery for high-end clients, having reliable Continuous Zipper tape makes all the difference. Your projects deserve materials that match your newfound expertise.
Ready to put your new skills to work? Start with a simple project to build confidence, then gradually tackle more complex applications. Before you know it, you’ll be the go-to expert for custom zipper solutions in your field.